

Purpose
This guide describes a procedure to connect a serverless AWS IoT back-end with a React.js web-app. We will use AWS Amplify to initialize the infrastructure and include user-authentication through AWS Cognito. This could be useful if you need to:
- View sensor data in real-time on a web interface.
- Learn how to limit your application’s data to authorized users.
- Navigate the AWS documentation by building a concrete example.
- Learn the benefits of building with React.js
The good news is this tutorial can be done within the limits of the AWS Free Tier!
End Result
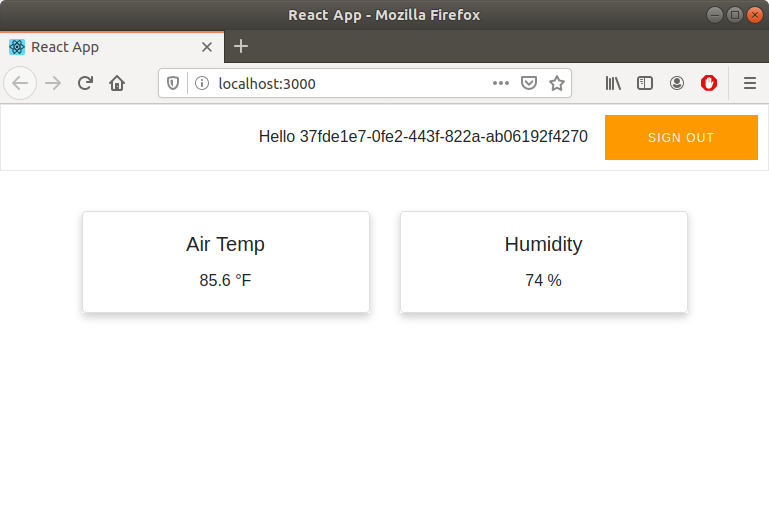
Shown below is the simple app that we'll build to demonstrate the connection between AWS IoT and React. Some styling is done using React Bootstrap.

Prerequisites
Overview
- Setting up the React Project using Create-React-App.
- Initializing AWS Amplify using its command line interface.
- Building the web-app.
- Configuring Permisssions
- Testing using AWS IoT Core
The AWS Amplify “Getting Started” section for React sets up the boilerplate React project and authentication with AWS Cognito. The AWS documentation can be difficult to navigate and is far-reaching. At time of writing the first steps are:
$ npx create-react-app sensor-nodes
$ cd sensor-nodes
$ npm install @aws-amplify/api @aws-amplify/pubsub
$ npm install aws-amplify-react
$ yarn add aws-amplify
Now, set up the AWS backend, add authentication, and push the configurations to the cloud:
# Initialize the Amplify project
$ amplify init

# Add authentication and push the local changes to AWS
$ amplify add auth
$ amplify push
Building the App:
The resources we added locally are now reflected in the cloud. Let's review the structure of our app.
To use React.js effectively we should build re-usable components. For this use-case we have multiple sensor readings coming from our device, "Air Temp", and "Humidity". If we add more sensors it would be cumbersome to keep building components, therefore we create one component named sensorData.js that lives in the folder src/components/.
To begin, we import the needed packages and configure Amplify with our AWS credentials:
import React from 'react';
import Card from 'react-bootstrap/Card';

import Amplify from 'aws-amplify';
import awsconfig from './../aws-exports';
import '@aws-amplify/ui/dist/style.css';

import { PubSub, Auth } from 'aws-amplify';
import { AWSIoTProvider } from '@aws-amplify/pubsub/lib/Providers';

Amplify.configure(awsconfig);
Next we add the AWS IoT PubSub plugin and configure it with our endpoints:
// Apply plugin with configuration
Amplify.addPluggable(new AWSIoTProvider({
aws_pubsub_region: '<YOUR_IOT_REGION>',
aws_pubsub_endpoint: 'wss://xxxxxxxxxxxxx.iot.<YOUR-IOT-REGION>.amazonaws.com/mqtt',
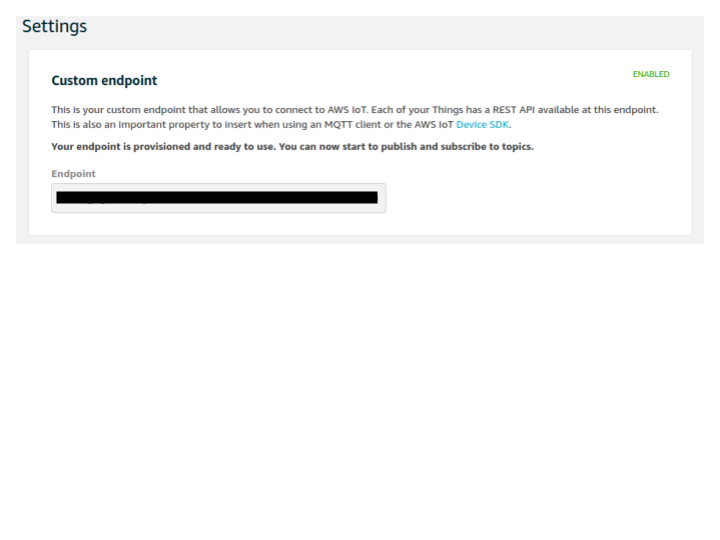
}));From the AWS Docs:
“Find your aws_pubsub_endpoint by logging onto your AWS Console, choose IoT Core from the list of services, then choose Settings from the left navigation pane.”
Below is a screenshot of what to look for:
To finish the component we build an ES6 class which does the following:
- Accepts a prop name that corresponds to the sensor name (eg. "Air Temp", "Humidity", etc.)
- Subscribes to the AWS IoT Topic of our choice, in this case it's myTopic.
- Dynamically change a React Bootstrap card component to display the data.
class Sensors extends React.Component{
    constructor(props) {
        super(props);
        this.state = {
          sensorMsg: '{"null": 0}'
        };
    }

    componentDidMount(){
        PubSub.subscribe('myTopic').subscribe({
          next: data => {
            try{
              this.setState({ sensorMsg: data.value });
            }
            catch (error){
              console.log("Error, are you sending the correct data?");
            }
          },
          error: error => console.error(error),
          close: () => console.log('Done'),
        });
      }

    render(){
        const { sensorMsg } = this.state;
        let sensorData = sensorMsg[this.props.name];

        return(
            <div className="Sensor">
                <Card style={{ width: '18rem' }}>
                    <Card.Body>
                        <Card.Title>{this.props.name}</Card.Title>
                        <Card.Text>
                            { sensorData } { this.props.unit }
                        </Card.Text>
                    </Card.Body>
                </Card>
                <style jsx>{
                `
                .Sensor {
                        box-shadow: 0 4px 8px 0 rgba(0,0,0,0.2);
                        transition: 0.3s;
                    }

                    .Sensor:hover {
                        box-shadow: 0 8px 16px 0 rgba(0,0,0,0.2);
                    }
                    `
                }
                </style>
            </div>
        )
    }
}

export default Sensors;
Now we modify App.js, we start again by importing packages:
import React from 'react';
import './App.css';

import 'bootstrap/dist/css/bootstrap.min.css';
import Container from 'react-bootstrap/Container';
import Row from 'react-bootstrap/Row';
import Col from 'react-bootstrap/Col'

import Sensors from './components/sensorData';

import Amplify from 'aws-amplify';
import awsconfig from './aws-exports';
import { withAuthenticator } from 'aws-amplify-react'; // or 'aws-amplify-react-native';
import '@aws-amplify/ui/dist/style.css';

import { Auth } from 'aws-amplify';

Amplify.configure(awsconfig);
We need the credentials of the user currently logged in, which we will configure permissions for using the AWS Command-Line Interface. This line prints those to the console:
Auth.currentCredentials().then(creds => console.log(creds));App.js is simply adding our Bootsrap cards and passing the prop names for sensor data we'd like to display:
function App() {
  return (
    <div className="App">
      <Container className="p-4">
        <Row className="p-3 justify-content-md-center">
          <Col md="auto"> <Sensors name="Air Temp" unit="°F"/> </Col>
          <Col md="auto"> <Sensors name="Humidity" unit="%"/> </Col>
        </Row>
      </Container>
    </div>
  );
}

export default withAuthenticator(App, true);
Creating IAM Policies and Setting Permissions:
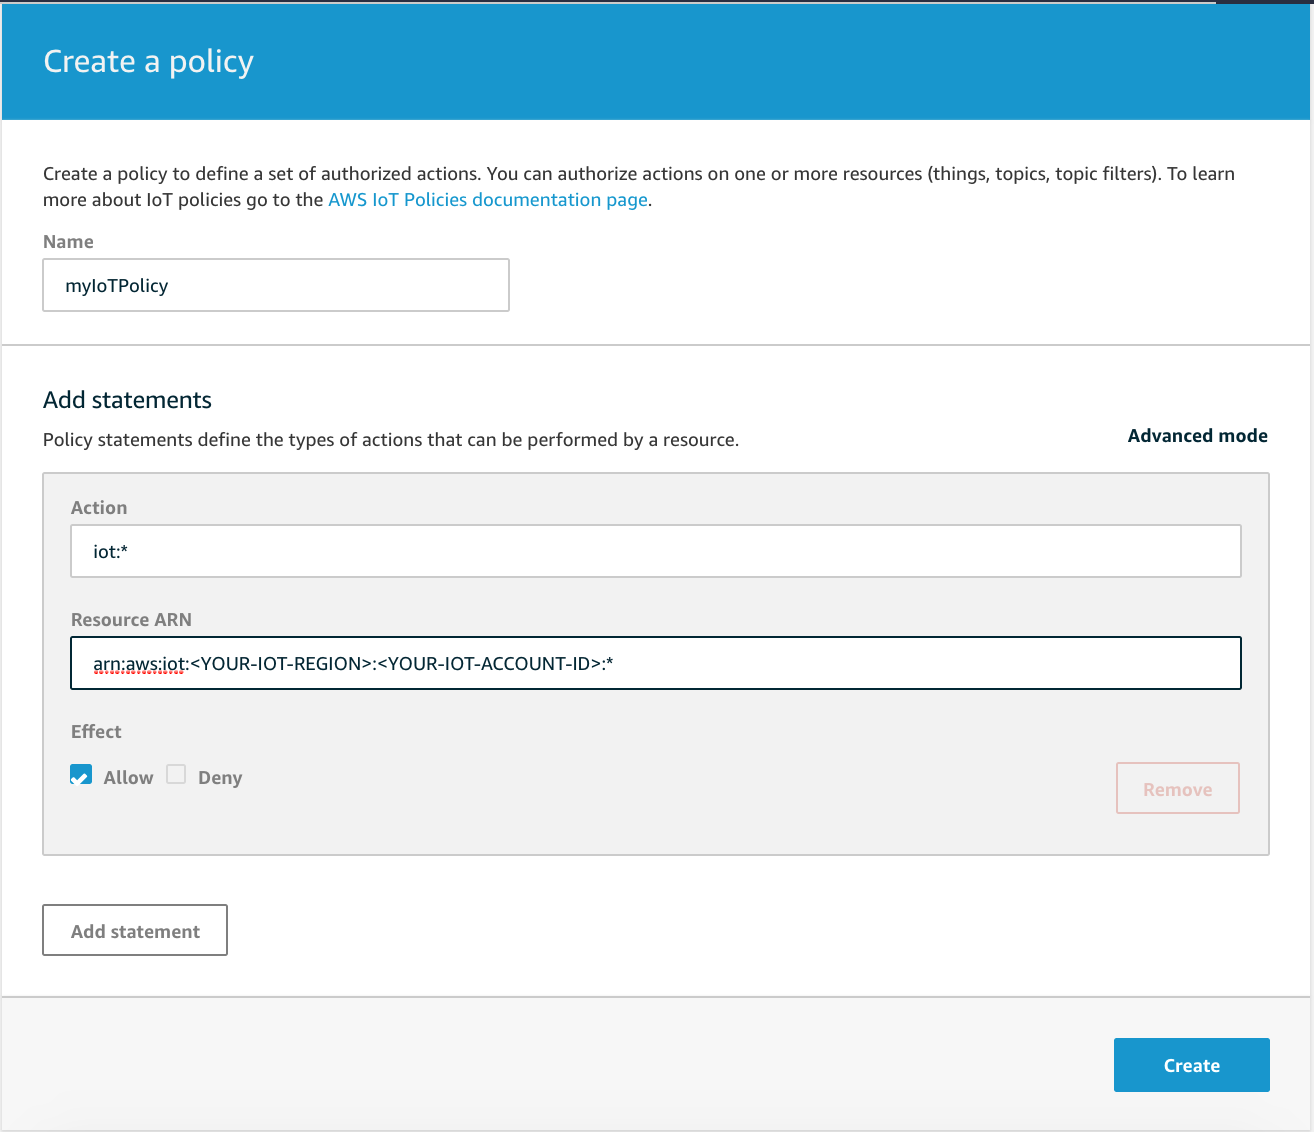
“To use PubSub with AWS IoT, you will need to create the necessary IAM policies in the AWS IoT Console, and attach them to your Amazon Cognito Identity.
Go to IoT Core and choose Secure from the left navigation pane. Then navigate to Create Policy. The following myIoTPolicy policy will allow full access to all the topics.”
Next, start the web-app with:
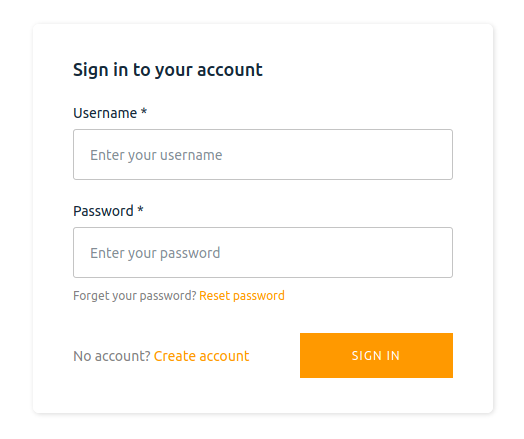
$ npm startThe sign-in page will appear at localhost:3000, you need to click on Create Account and create a new user. You will then receive an email with a verification code.
After signing in, open the console log and copy the Cognito Identity ID to attach myIoTPolicy to the user. Run the AWS CLI command in the terminal:
$ sudo apt-get update
$ sudo apt-get install awscli
$ aws iot attach-principal-policy --policy-name 'myIoTPolicy' --principal '<YOUR_COGNITO_IDENTITY_ID>'
“Failing to grant IoT related permissions to the Cognito Authenticated Role will result in errors similar to the following in your browser console: errorCode: 8, errorMessage: AMQJS0008I Socket closed.”
Open the AWS Console and select CloudFormation from the Services tab. Select the parent stack of the solution we created, which for this tutorial is named sensor-nodes:
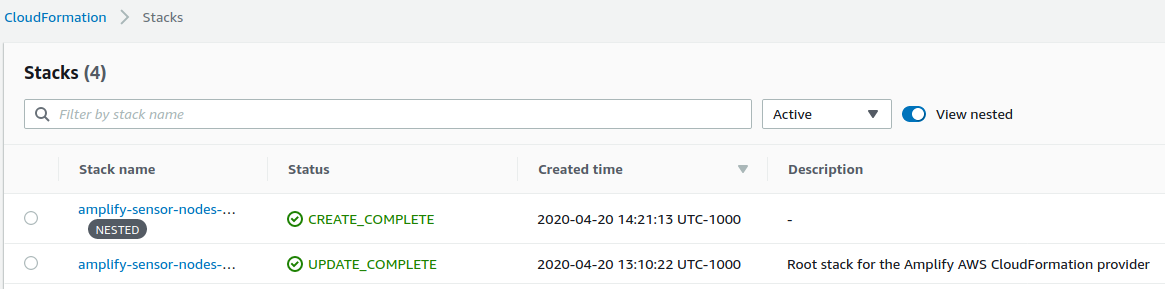
Select the Resources tab and and click on Auth Role > Physical ID. The IAM console will open, which you then click on Attach Policies. Search AWSIoTDataAccess and AWSIoTConfigAccess, select them and click on Attach policy.
Testing the Application
AWS IoT has a convenient testing feature that lets you publish MQTT messages on selected topics. From the AWS Console go to Services and select IoT Core. Go to Test and scroll down to Publish. Enter a message to be sent on the MQTT topic that we specified, myTopic.
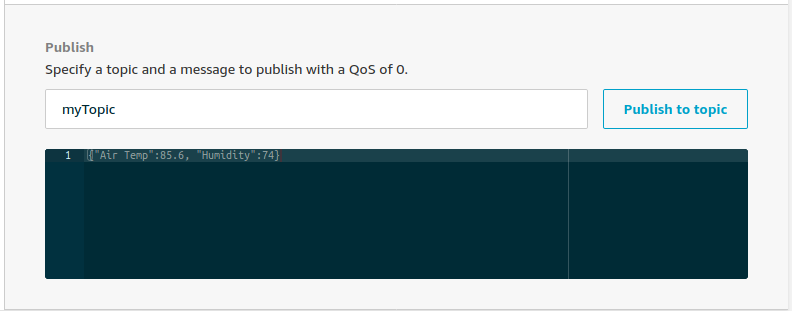
The result should instantly appear on the page!
Now we have the means to connect real-time data from IoT devices connected to AWS IoT Core. Once connected to AWS there are many options available to expand the application, including storing data in DynamoDB or setting up SNS alerts for a notification service.
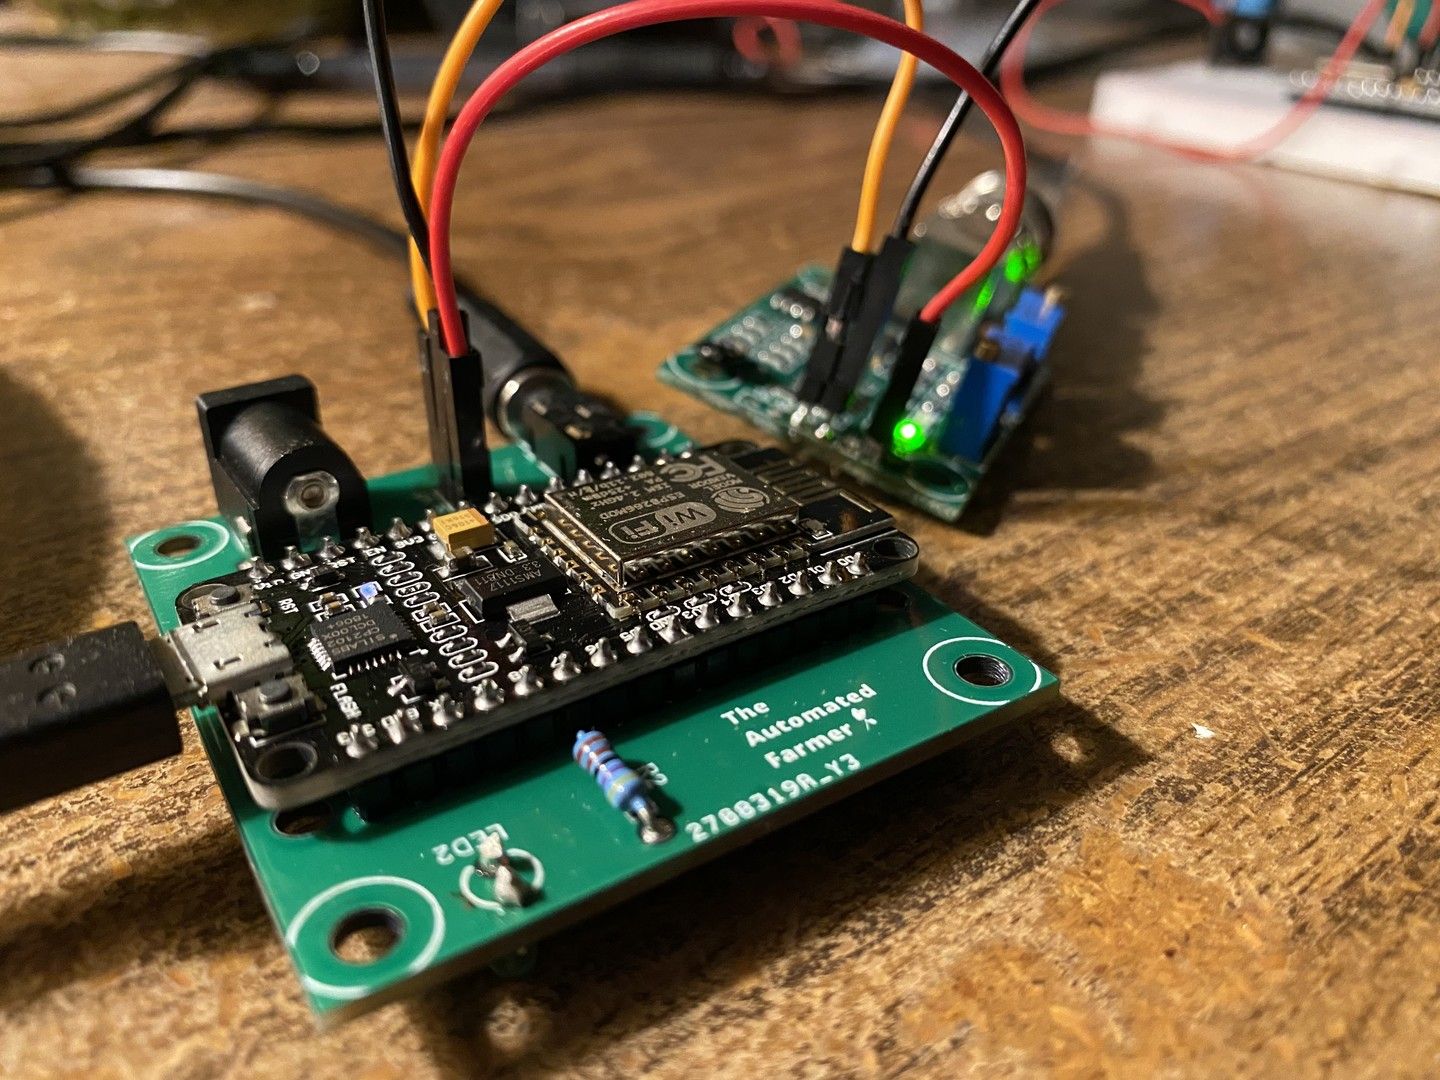
The next part will include pushing sensor data to our dashboard with real hardware.
Questions? Comments? My email is below. Thank you for reading.
jamesthesken@gmail.com